IDEXX Radiology Imaging Viewer
The IDEXX Radiology Imaging Viewer allows IDEXX’s radiology, cardiology, and specialty consultants to view and manipulate patient images to diagnose medical conditions. This viewer works in tandem with the IDEXX VMS Specialist app and auto-displays patient images as new cases load with the VMS Specialist app. The goal of the project was to increase specialist efficiency when diagnosing medical conditions. This cross-team project involved collaboration between the Telemedicine and Digital Imaging teams. It became the first cross-team project ever completed within the IDEXX software realm.
My Role
UX/UI Design
Prototyping
Research
Team
2 Designers
2 Business Analysts
2 Sr. Software Engineers
7 Radiologists
2 Product Owners
Demographic
Radiology Specialists
Number of Users
150

Sample Radiologist work station: VMS Specialist and PowerScribe (Left), Web viewer w/ radiographs (Middle), Communication platforms, preferred browser, email, etc. (Right)
Design Challenge
Design a responsive web-based image viewer that replaces Viewer18 (Old Desktop Viewer) and the IDEXX Web PACS viewer. The viewer needed to support the advanced manipulation and annotation of all medical image types, including radiographs, ultrasounds, CT, and MRI. Finally, it needed to meet the needs of both IDEXX Telemedicine and Digital Imaging users.
Background
At IDEXX, almost all software teams work separately on individual product lines. The teams are so siloed that collaborative projects across teams are impossible. This is something the UX team is working on, with our end goal being to create one software ecosystem that contains all product functionality. I was fortunate to participate in a cross-team project between Telemedicine and the Digital Imaging team. The Digital Imaging software team provides veterinarians with the technology to capture, review, and submit radiology images for specialist review. Telemedicine needed a new web-based imaging viewer, and the Digital Imaging team wanted to update their current customer-facing web viewer. This was an excellent opportunity to team up and collaborate to create a solution that would be beneficial to both teams' users.
First Steps
We began this project by looking at both current applications in use and created an audit of the tools from each. For this audit, we utilized Confluence for all documentation storage. Once the audit was complete, we identified the tools and functionality that were the same or similar. This allowed us to quickly identify the differences between the two viewers and decide what functionality needed to be transferred into the new application. As a team, we decided that both user bases had different needs that did not necessarily match. The decision was made that the base functionality of the app would remain the same, but the tools needed by the different users would change. The specialists from Telemedicine needed far more advanced functionality than the veterinarians using the Web PACS viewer. Because of this, the ability to hide features based on user type was created on the backend.
Example Audit of Tools within Confluence

Once the functionality needed for both user bases was solidified, we created wireframes and simple prototypes to test various functionality before bringing the designs to stakeholders. We focused mainly on documenting how each tool would behave and where it would be located within the toolbar. Because the overall layout of an image viewer is pretty simple, a toolbar, image thumbnails, and image panes, the wireframes focused exclusively on the location of the tools within the toolbar and the thumbnails. The specialists constant involvement in the design process was essential for us to move forward with the project. We held weekly feedback sessions with 7 different specialists.
Below is a sample from the discussion guide we used during our initial feedback sessions:
This discussion focused on the web viewer wireframes shown below.
-
What’s your initial impression of how these tools are organized?
-
Do the icons resonate with you?
-
What would you expect to happen when you clicked on one of the tools?
-
Would you always need this toolbar visible to read a case?
-
Would it distract you if it hid with an animation when you weren't using it?
-
Would you want to customize this toolbar?
-
What patient information do you need, if any, within the viewer?
-
How would you expect thumbnails to be displayed? By date captured, by modality?
-
Would you expect historic case images to be represented differently or in a separate location?
-
Do you need to see all the thumbnails all the time?
-
What functionality do you not see here that you need to do your job?
-
What, if anything, seems positive to you?
-
What concerns do you have?
Things We Heard:
“The location of the tools makes sense. You've got the manipulation, annotation, and CINE and MRP tools all separated out which is helpful. I don't use the CINE or MPR tools since I don't read MRIs or CTs so I probably don't need them personally. If they stayed that's fine though. The patient name is all I need to know I have the correct images up for the case I'm reading. The thumbnails are fine, I don't need to see every single image at once so having a scrollable view of them works. Could I mark interesting images or ones that I want to go back to later? Overall this seems like a good setup, I don't have any concerns yet.”
“This is logical to me as far as the grouping of tools. The icons also make sense, I've seen similar ones in Viewer18. I don't see anything missing from the tools that I would need. Having some type of visual identifier of different case images would be helpful. If I add prior case files to this is it going to show them alongside the current case thumbnails? I tend to want to swap the thumbnails around to put like things in context with one another. For example, all the thoracic images would be in one location for me. I drag and drop them today to organize them. Would it be possible to have the hanging rules set automatically for these images? When I load a case the first thing I do is reorient the images so they are displaying the right way.”
“I see the second viewer window over there with the patient name and tools on it as well. I really don't need the all of the tools in every window all the time. Probably all I need would be the annotation and manipulation tools. Everything else can just stay on the main monitor. I also use a portrait monitor as my second monitor so the screen width isn't super wide. I read cases with sometimes hundreds of images in them and I reorder them today in the viewer, does this allow for that? I drag thumbnails today to group images.”

The Tools
We brought in many of the tool behaviors familiar to our users to reduce the initial cognitive load required to relearn the software. But there's always room for innovative enhancement! We carefully worked alongside our users to focus on what kind of enhancements would make sense for their experience. Documentation was a huge part of this project; we needed to develop the tools to be exact replicates of the requirements of our users. We documented behaviors, keyboard shortcuts, mouse shortcuts, and the various UI elements. This work was done collaboratively with our radiologist specialist team and completed in multi-hour working sessions. User testing would be completed again once the tools were developed. Below is an example of the Free Text tool used in creating annotations directly on the image. The interactions for this tool needed to be quick and intuitive. The tool was simplified to only allow editing of text size and color. Because efficiency and accuracy were the two main drivers for this project, we wanted the UI to be as intuitive as possible without the need of guides or user manuals.
Example of Radiologist working session feedback:
"I want to zoom into a specific area of interest and center on the selected area rather than using the zoom to only focus on the center of the image like in Viewer18."
"A magnifying glass kind of tool would be helpful for just scanning across an area versus zooming into the entire image."
"I want to press down the mouse wheel to adjust the window leveling."
"Clicking, holding, and then dragging the mouse across the window horizontally should adjust the contrast level."
"Clicking, holding, and then dragging the mouse across the window vertically should adjust the brightness level."
"The text annotation colors should be really bright, maybe neon, so they stand out from the radiographs."
"The labels tool should provide different options based on the modality of the image."
"It would be nice if directional labels, left and right, were automatically added by machine learning."
Example of tool documentation for the Free Text Tool

First Design Iteration
Because most of the radiologist's feedback was focused on the tools and how they behaved, we could move forward with the wireframes we initially made for the base layout of the viewer and begin working on mockups, prototypes, and specs for dev implementation. The development plan for this project was to build the base framework for the image viewer and then add in tools as the team approved them. The settings pages were also pre-approved by the radiologist team to be developed. Things like keyboard shortcuts could be modified in the future if needed but were unlikely to be needed.
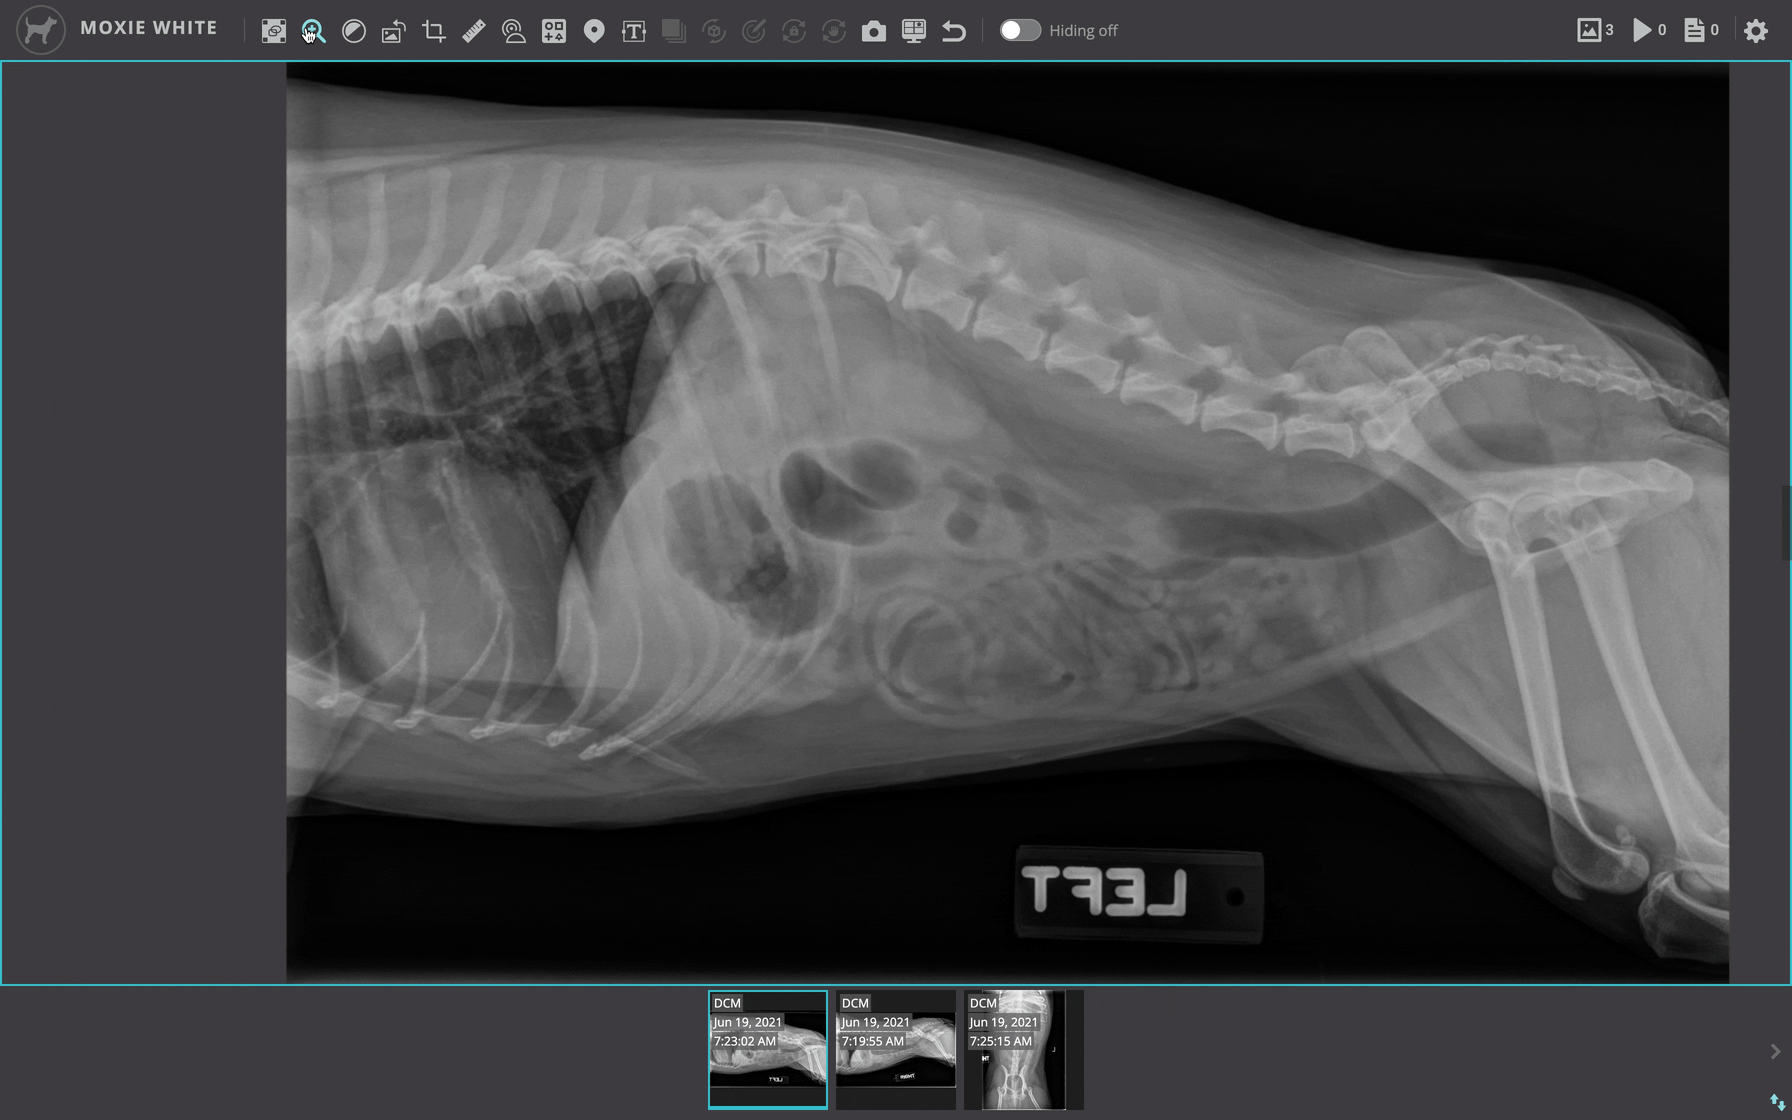
Main viewer screen with tools and thumbnails

Settings page keyboard shortcuts

ACVR User Testing
Because of the number and complexity of some of the tools we were creating for this image viewer, the product team decided to develop the entire toolset without creating prototypes to test with our users. My design partner and I felt comfortable with this decision since the radiologists were familiar with many of the tools' behaviors from prior applications. The viewer was launched in a BETA format and could be turned on by any of the radiologists at any time. The launch of the BETA version coincided with the annual AVCR conference, which was the perfect opportunity to watch radiologists using the viewer in person. I was able to sit and watch radiologists reading out their cases using the BETA image viewer and get feedback in real-time. Aha! was used as a portal for capturing their feedback on the BETA version of the image viewer. Using Aha! was also helpful because other radiologists could vote on if they agreed something would be valuable to them as well.

We had multiple "reading stations" where specialists could set up and start reading radiology cases. We had 60 of our 150 radiologists join us at ACVR for BETA testing. Overall the launch was a success, the feedback was highly positive, especially around how quickly the images loaded and how easy the tools were to use. The average "read" time of a typical radiology case is about 4 minutes, with this new viewer that time was cut down to roughly 3 minutes. With some specialists reading over 100 cases per day these efficiencies had gains of about 30-40 extra cases per day.
Feedback we heard at ACVR:
"Although I realize that we can reorganize the images in the thumbnail bar or in by selecting the double white square tool on the viewer, it would be much faster/easier for those of us viewing studies to be able to drag the images we want into the viewing screens simply because you don't always want to view the two images that are side-by-side through the entire formation of a report. Having to re-order the thumbnails then reload the pair you want takes a few seconds but that adds up in cases that have a lot of images."
"It would be really helpful for the thumbnails of only DICOM images to have time stamps on them in the web viewer. This helps to organize large cases like contrast studies without having to flip back and forth between the images to look at the tiny print up in the corner. Other than that I really like this so far, it seems faster at least when loading images."
"Could we have a way to sort the images by the date and time in the web viewer? There was a way to do this is Viewer18 but I don't see it here. I've found all the other tools I use daily, I like these icons better than the ones in Viewer18 they make more sense."
"This is incredibly fast compared to viewer18, I love that I don't have to download images anymore. Having them automatically load for me when I start another case is so nice. The only thing I have seen so far that I don't love is that you got rid of the copy feature. I like to have multiple copies of the same image so I don't have to continuously reorder the images. Being able to duplicate images allows me to order them so each lateral has a VD and just click on the appropriate image as needed."
The general feedback was incredibly positive, most radiologists only had one or two small things they pointed out or asked if it could be included. The majority felt like the viewer met their needs, they felt confident using the tools and were excited for the final launch.
Final Design
Feedback from our radiologists on the image viewer will always be welcome and encouraged. Much of the feedback received at ACVR has been implemented in the demo below. We continue to add more capabilities to the viewer including the potential of artificial intelligence to help in the aid of diagnosis.